Did you know you can sync todo.vu with any desktop or mobile calendar app that supports an iCalendar (iCal) link? (And, these days, that’s most of them, including Google Calendar, Apple Calendar, Outlook… the list goes on!)
If you’re anything like us here at todo.vu, your calendar plays a key role in your management of day-to-day activities. More than anything, it’s a helpful notification tool and visual planner – if a task is not on the calendar, it’s likely to be missed.
That’s why we’ve made it easy to share information from tasks and time tracking in todo.vu with your calendar of choice. Due dates from within todo.vu can appear on your calendar, as well as data on your time tracking activities.
Note: This guide focuses exclusively on linking todo.vu with Google Calendar. Stay tuned for tips on linking todo.vu with your other favourite calendars.
1. Sync due tasks with Google Calendar
You can allow todo.vu to share due tasks information with Google to see and receive notifications about these tasks on your Google Calendar.
Here’s how to do this:
Go to todo.vu’s calendar by selecting the clock icon on the left-hand side of the workspace, or go to this link when already logged in to your todo.vu workspace: todo.vu/login?/#/time.
Navigate to the three-dot menu on the right-hand side of the calendar. Click it, and select ‘Sync with an external calendar app’.
A pop-up window will appear; if this is the first time you have enabled todo.vu’s calendar sync, first you will be asked to generate your iCal URL. Select generate.
Now, you will see two iCal URLs. The first URL relays information about todo.vu tasks with due dates, and the second URL relays information about todo.vu time entries. As we are syncing our due tasks with our calendar app in this tip, we will be using the top URL.
In the right of that top URL’s field, you will see three icons; if you hover your mouse over these icons, a tooltip will explain what happens if selected. Select the first of the three icons: ‘Copy to clipboard’.
Now, head to your Google calendar at calendar.google.com. In the sidebar to the left underneath the smaller monthly snapshot calendar view, you will see a section called ‘My calendars’ and ‘Other calendars’. Select that plus button (+) to the right of ‘Other calendars’.
Select ‘From URL’ in the drop-down menu.
In the blank field (‘URL of calendar’), press [Ctrl]+[v] or [Command]+[v], or right click, to paste your previously copied iCal URL.
Select ‘Add calendar’.
You can choose to make the calendar publicly accessible if you wish.
You will then see the calendar from todo.vu added underneath your ‘Other calendars’ list. Select it to update the calendar’s name; we like to rename this one ‘Due tasks’.
Leave the general settings with the back button at the top left-hand side of the screen. You can update settings on your new calendar at any time by hitting the three-dot menu to the right of the calendar’s name.
This includes setting up notifications to alert you at set intervals prior to the due task time.
It can take some time for your due dates to appear on Google Calendar. If you’re still not seeing them after 24 hours, please get in touch with us at support@todo.vu to see if we can help you before turning to Google Support.
When you click on a due task event in Google Calendar, you’ll be able to see more details about it and even navigate straight to the task via your Google Calendar.
2. Set up a Daily Agenda
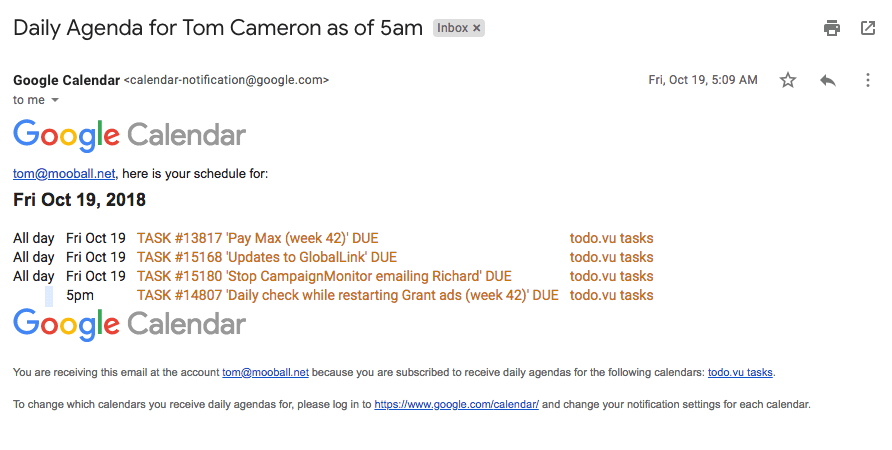
In addition Google notifications for todo.vu task due dates, you can also set up Google’s “Daily Agenda” feature. This will send you an email at 5 a.m. each morning (in your current timezone) with information on your todo.vu tasks which are due on that day.
Each event will have a hyperlink back to the task in todo.vu.
Here’s how to do this:
Follow all of the instructions from point 1. above to add a ‘Due tasks’ calendar
Navigate to your ‘Due tasks’ calendar settings either with the cog icon at the top of the calendar, or by selecting the three-dot menu to the right of any of your ‘Other calendars’ and selecting ‘Settings’ from the pop-up menu that appears.
Make sure you are in the settings of the right calendar for which you want to set up a Daily Agenda.
While on this settings page, scroll down until you see ‘Other notifications’ and toggle the bottom setting, ‘Daily agenda’, from ‘None’ to ‘Email’.
Google will automatically save this notification setting for you, and you’ll now receive helpful emails at 5 a.m. each morning with your due tasks for the day.
3. Sync todo.vu time entries with Google Calendar
You can also share your todo.vu time tracking data with Google Calendar to see previous and future time entries on your Google Calendar.
Remember, a time entry is a detailed record of time that has been logged in todo.vu; either tracked in real time by a user with todo.vu’s timer, or recorded manually before or after the fact. Time entries recorded on tasks contribute to accurate and transparent billing and business reporting.
Here’s how to share todo.vu time entry data with Google Calendar:
Follow the steps in point 1. to generate your iCal URLs. To recap, on todo.vu’s Calendar (which you can navigate to by selecting the clock icon on the sidebar to the left), select the three-dot menu from the top right-hand side of the workspace. Click ‘Sync with an external calendar app’.
This time, copy the second URL under ‘Time entries’ by selecting the first icon on the right of the URL field.
Now, head to your Google Calendar at calendar.google.com. Follow the same instructions in point 1. for adding the URL to Google Calendar. That is, select the plus (+) button beside where it says ‘Other calendars’ on the left-hand side of the Google Calendar, and select ‘from URL’.
Add your previously copied Time entries iCal URL and select Add Calendar. Then, rename this calendar. We like to call this one ‘Time logged’ – but choose whatever makes the most sense to you and your workflow.
Again, you can update settings on your new calendar at any time by hitting the three-dot menu to the right of the calendar’s name.
Note that it will take some time for your time tracking data to flow from todo.vu to Google Calendar; however, you should be able to see this data on the Google Calendar the day after time was tracked at the very latest.
The frequency and speed of syncing is controlled by your calendar system, so it may vary.
*Note that with todo.vu’s new calendar, you can set time entries for events in the future – such as upcoming meetings. With the time entry calendar sync, these details will also appear in your Google Calendar, saving you from double data entry.
4. Sharing your calendar links with others
If you have shared your iCal links with others and you wish to revoke their access, simply navigate to your iCal URLs in todo.vu through the three-dot menu on the Calendar page, and select ‘Regenerate’ or ‘Delete’.
When you do this, whoever had the previous iCal link will continue to see any due dates that were created prior to the iCal URL change. They won’t see any new updates or time entries.
You may not want to do this often, because when you do, you will have to repeat point 1. and point 3. to update your new iCal links in Google Calendar.
Advanced Google users only
If you are technically adventurous and working with Google Calendars, you may also want to check out a more advanced solution called GAS-ICS-Sync – https://github.com/derekantrican/GAS-ICS-Sync
Google’s default iCal feed only syncs data intermittently and there is no way to control this feed. Plus, it generates read-only calendars that you are unable to add notes to or update.
With the GAS-ICS-Sync solution, you can install an appsscript into your Google Drive which executes at a defined interval and pulls the events from todo.vu to your calendar more frequently and with more configuration options available.
I won’t go into all the technical instructions here, but essentially you clone a copy of the appsscript into your own Google Drive, then you configure its parameters to suit your requirements. You then run an install process which will configure and start it running.
Once you have it working, your calendar will sync frequently and reliably.