Think of all the times you have been using a program which you thought you knew well, only to be shown by someone else that there was a shortcut or feature you knew nothing about. This is normal, of course. I would be relatively confident to bet that most of us use our tech tools and platforms only for their obvious features and the rest remains a mystery.
While todo.vu may have a simple user layout, designing a productivity tool to truly help you to improve your task management and productivity meant sneaking in many additional features to give you shortcuts, admin tricks, and productivity hacks.
In a three-part series, we are going to show you nine todo.vu hidden features which can be used to save you time, improve productivity, and make tracking, completing and billing your tasks, easier than ever.
Hidden feature 1: Admin users can add time to other users
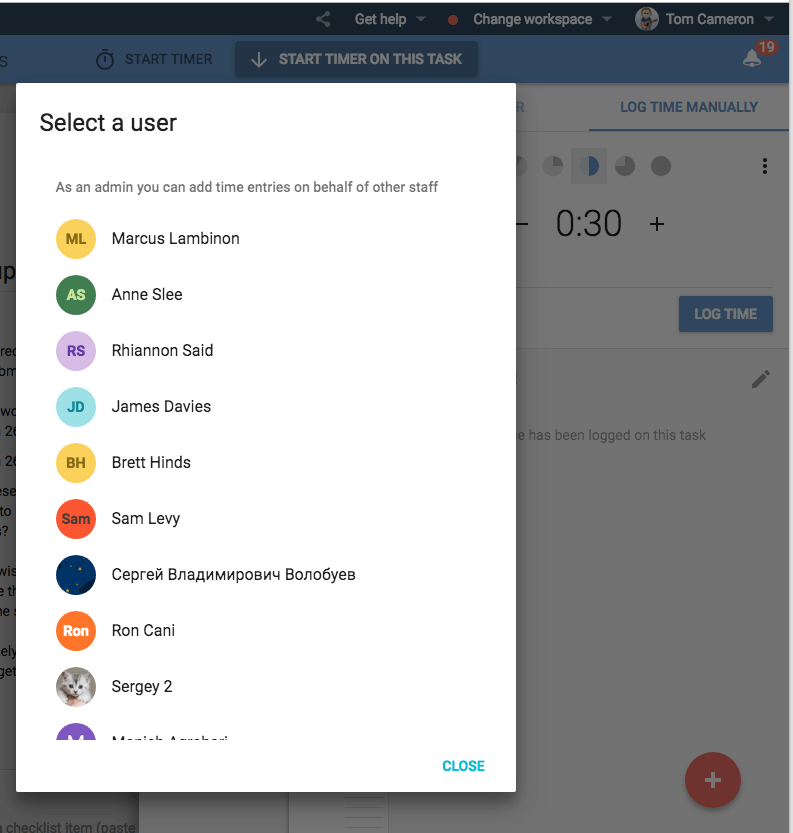
This feature is exclusive to admin users and allows you to add time on behalf of other users.
This is done while entering time on the task. You simply click on the avatar just under the note.
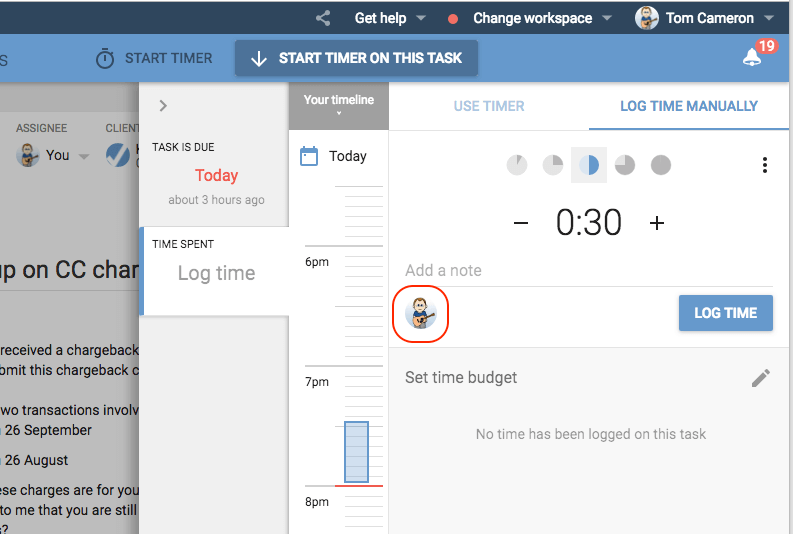
When you click on the avatar, you will have a list appear which shows all the other staff in the workspace so you can select one. Once the user is selected, the avatar changes to that user and the time entered is as if it was done by that other user.
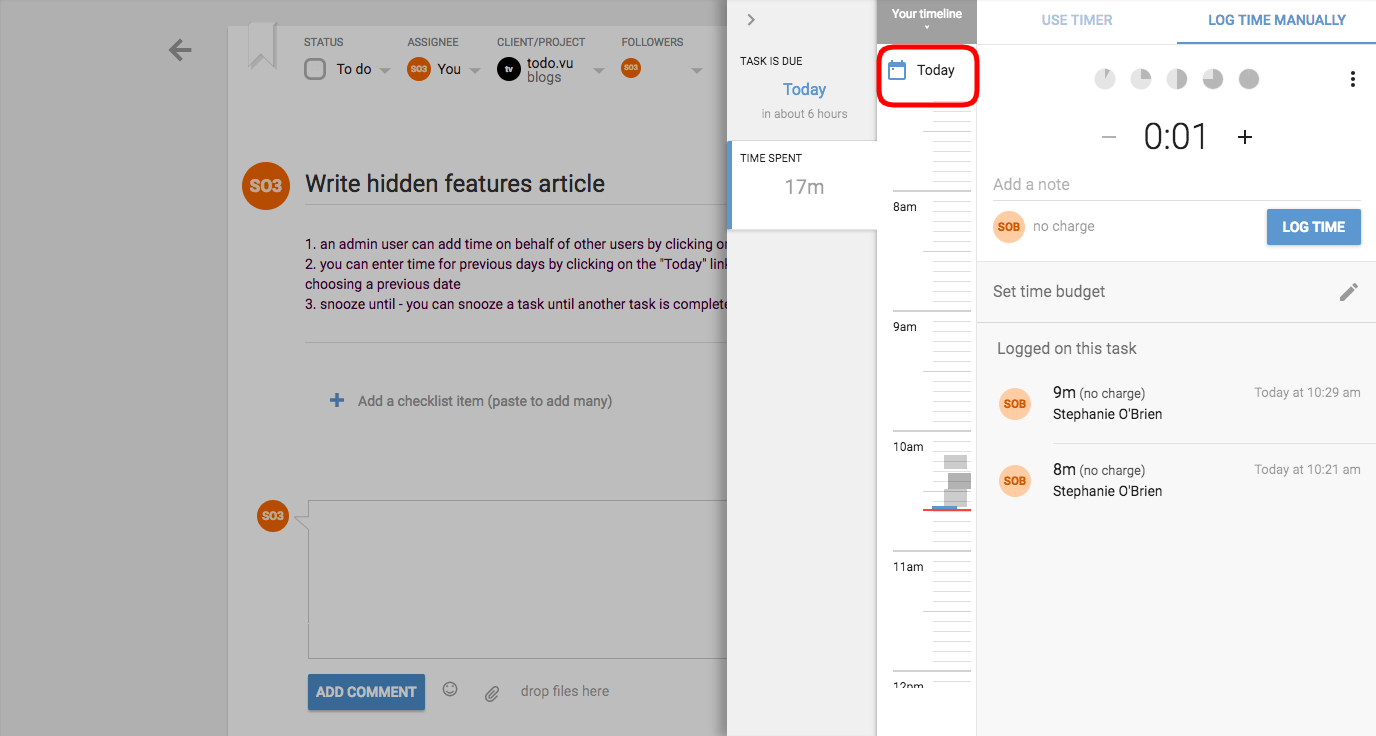
Hidden feature 2: Entering time on previous days
If you forgot to log your time on previous days, never fear. todo
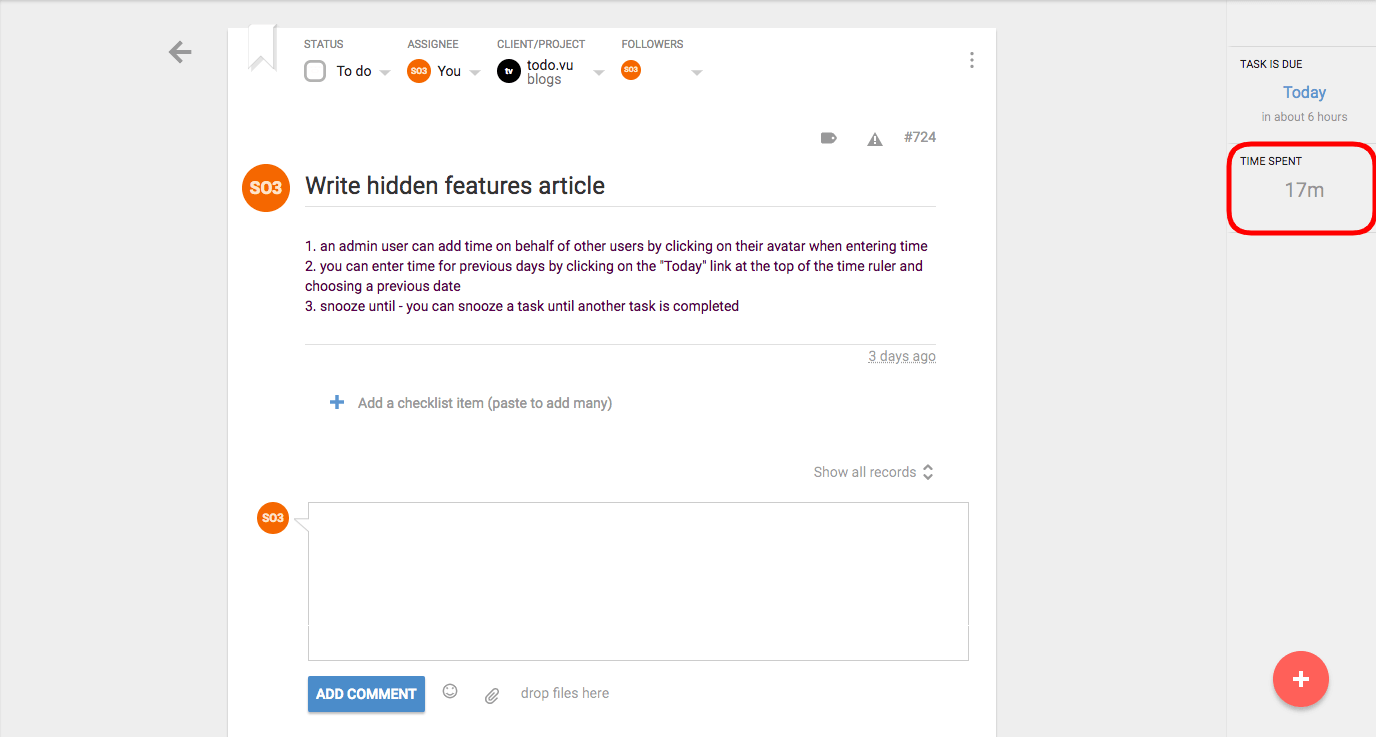
To find this hidden feature, go into the activity for which you wish to add time to a previous date.
When in the page, click on the “Time Spent” button on the right sidebar.
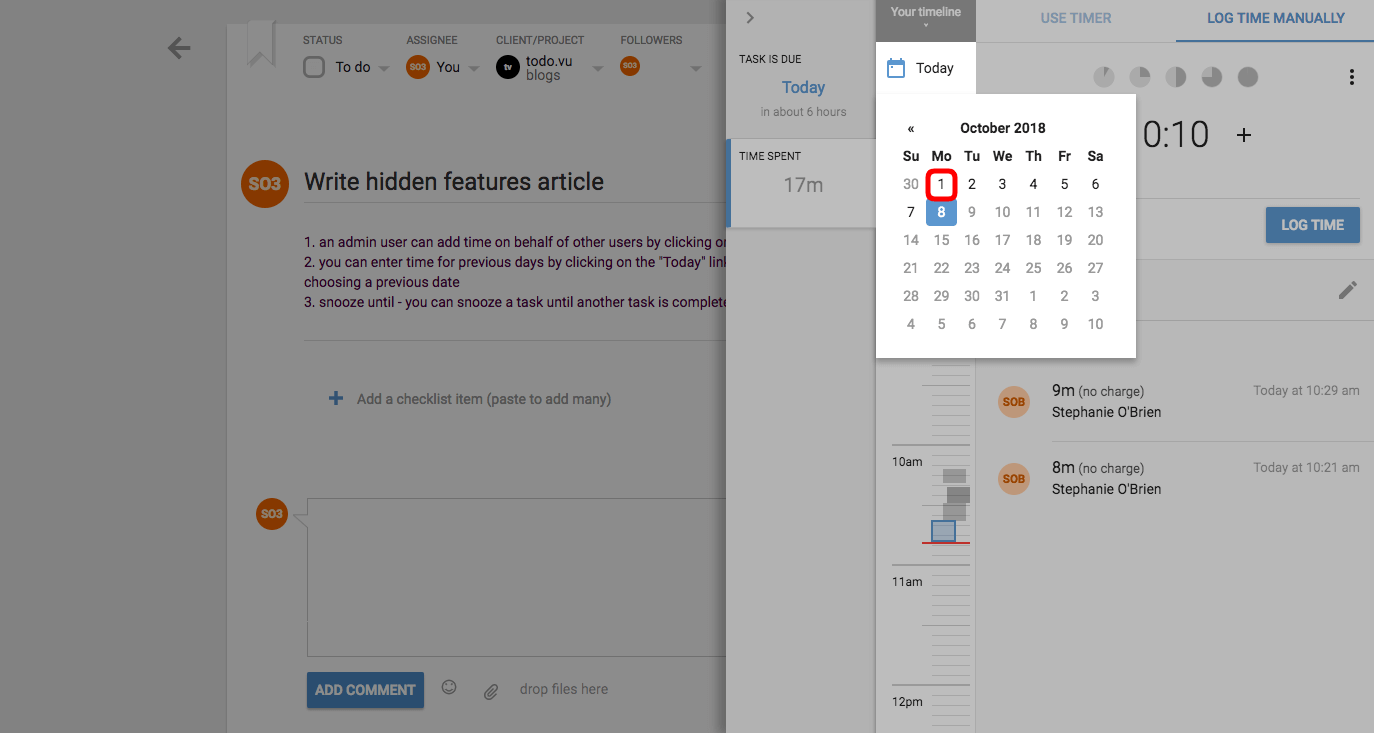
When the drawer opens, click on the “Today” link at the top of the time ruler. From here you can choose a previous date.
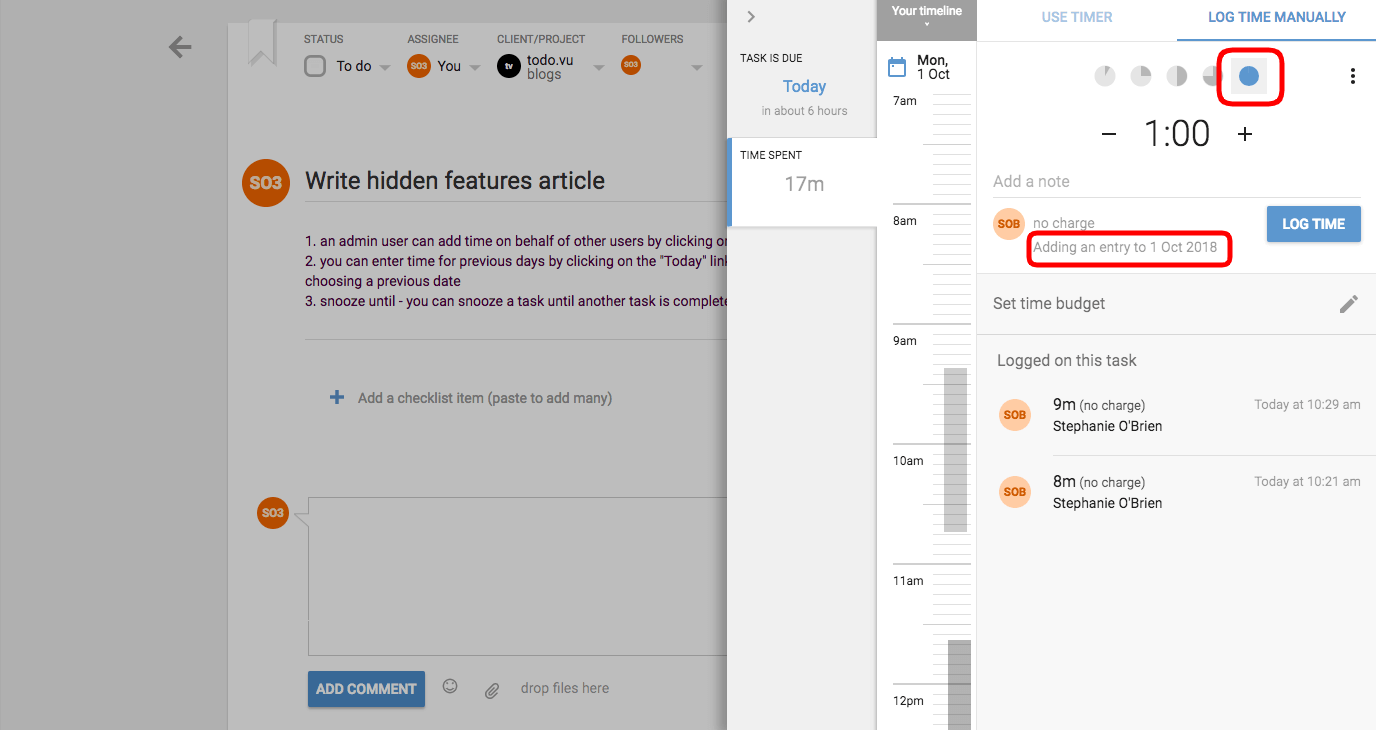
Once you have selected the previous date, you can add time manually by using one of the five pre-set times, or the “-” and “+” symbols.
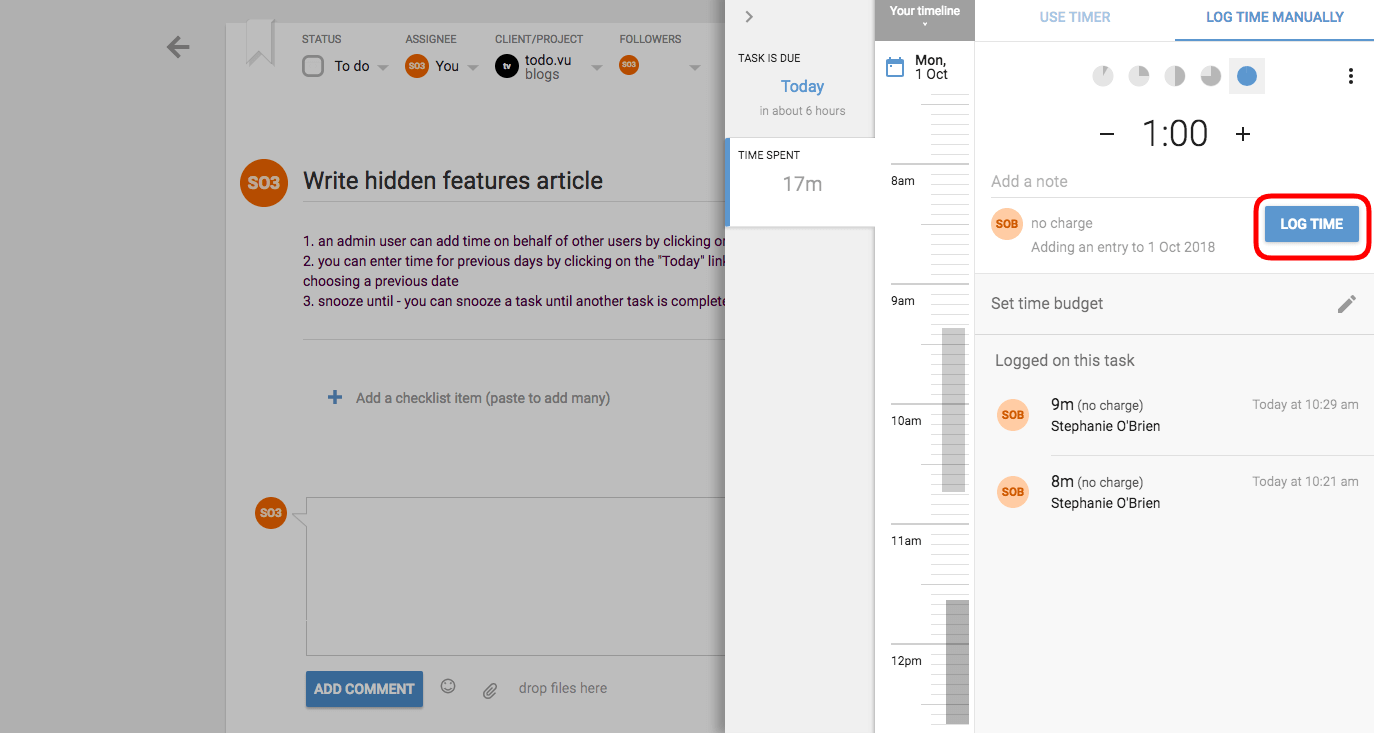
Once you have entered the time you wish to add, simply click on “Log time”.
Hidden feature 3: Snooze until
Within the snooze options, snooze until allows you to snooze a task until another task is completed.
First, go into the task which you wish to snooze until.

Once in the task page, go to “Status” in the top left corner of the task and click on the drop down.

Within the drop down you will see the second option to “Snooze”. When you hover your mouse over this option, it will present three options: Until someday; Until another task is done; Until a given date.
You want to select “Until another task is done”.
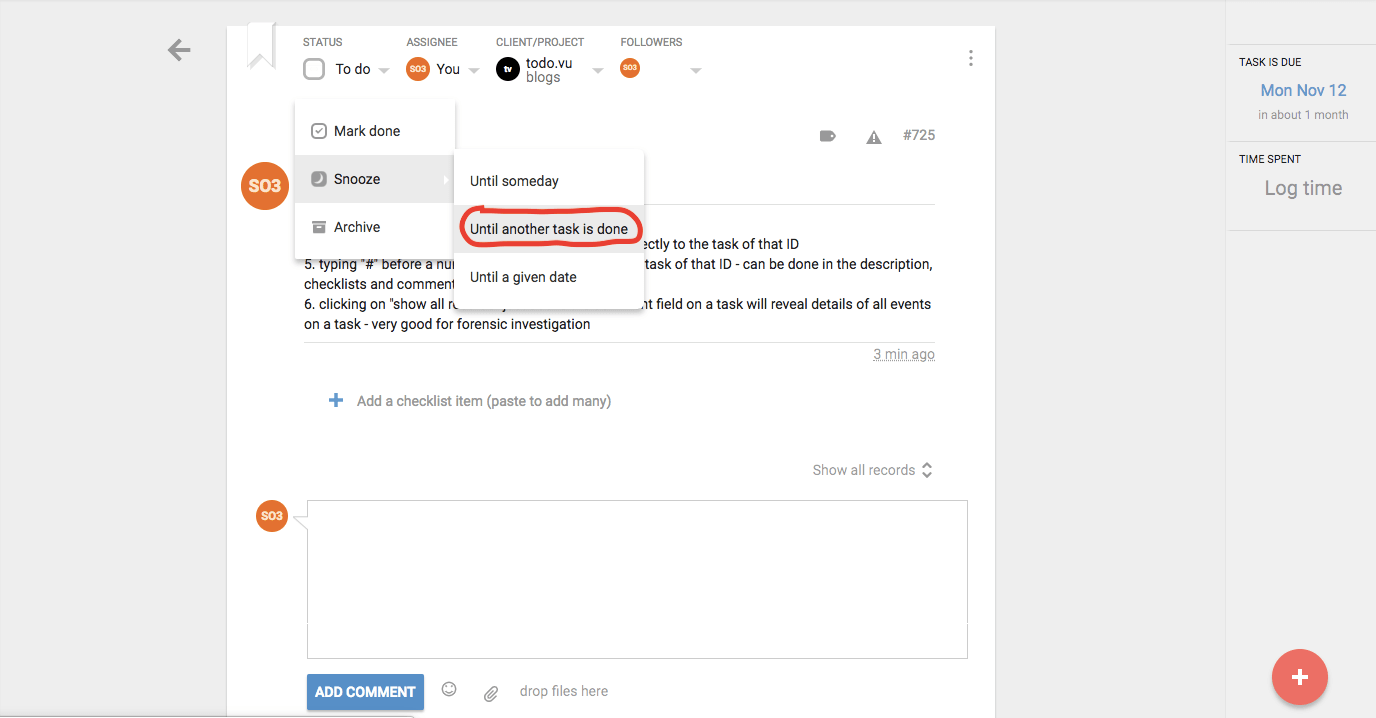
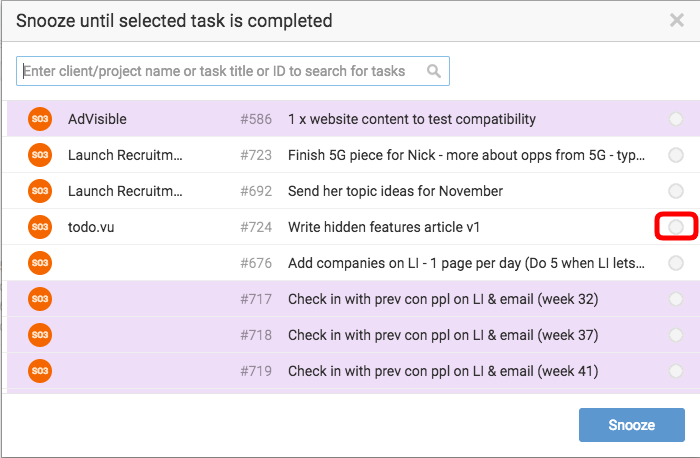
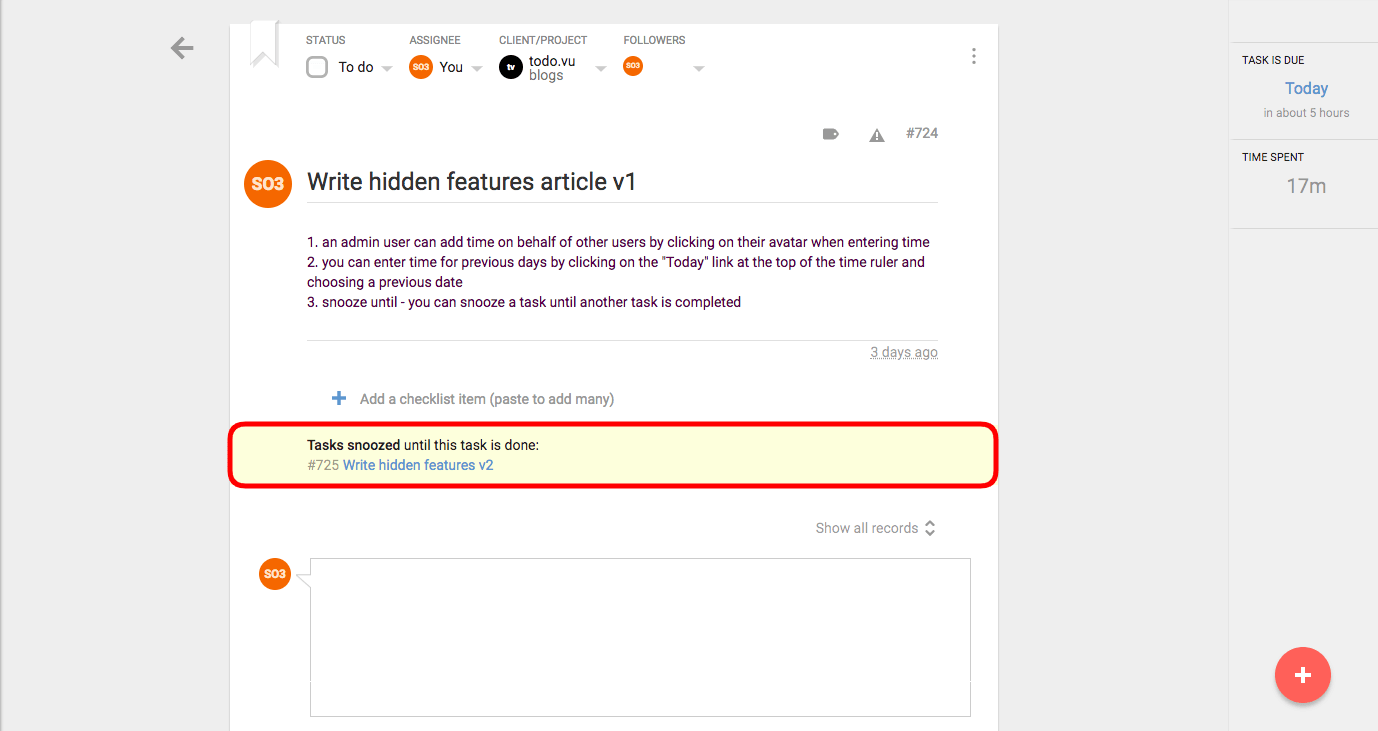
When you select “Until another task is done”, a window will appear asking which task you would like to trigger the selected task to un-snooze. In our case, we are selecting “Write hidden features article v1”.
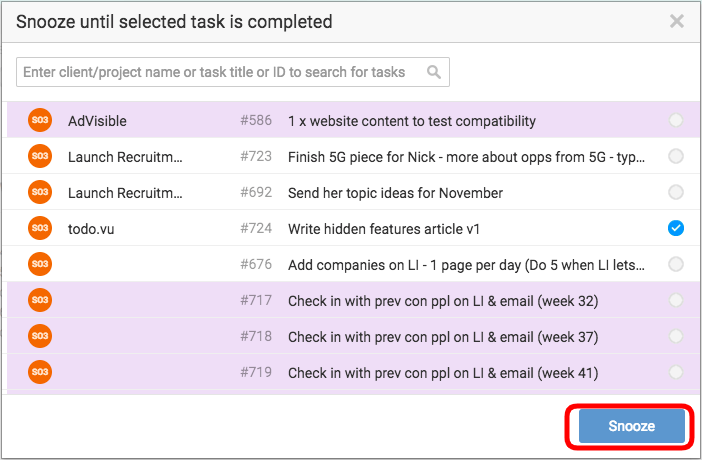
Once the task is selected, simply click on “Snooze”.
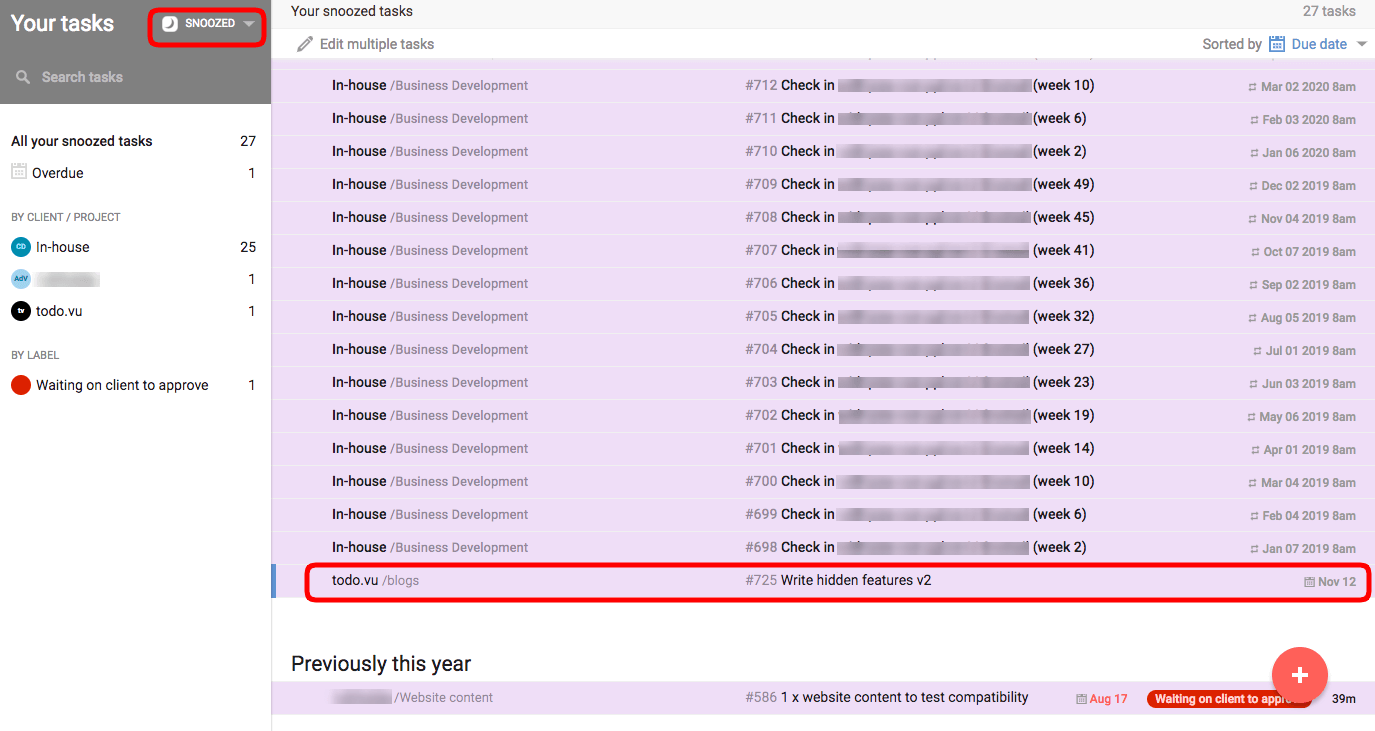
Once this action is completed, you will not be able to see this task in the “Your tasks” page. This activity can be found by searching for your snoozed activities.
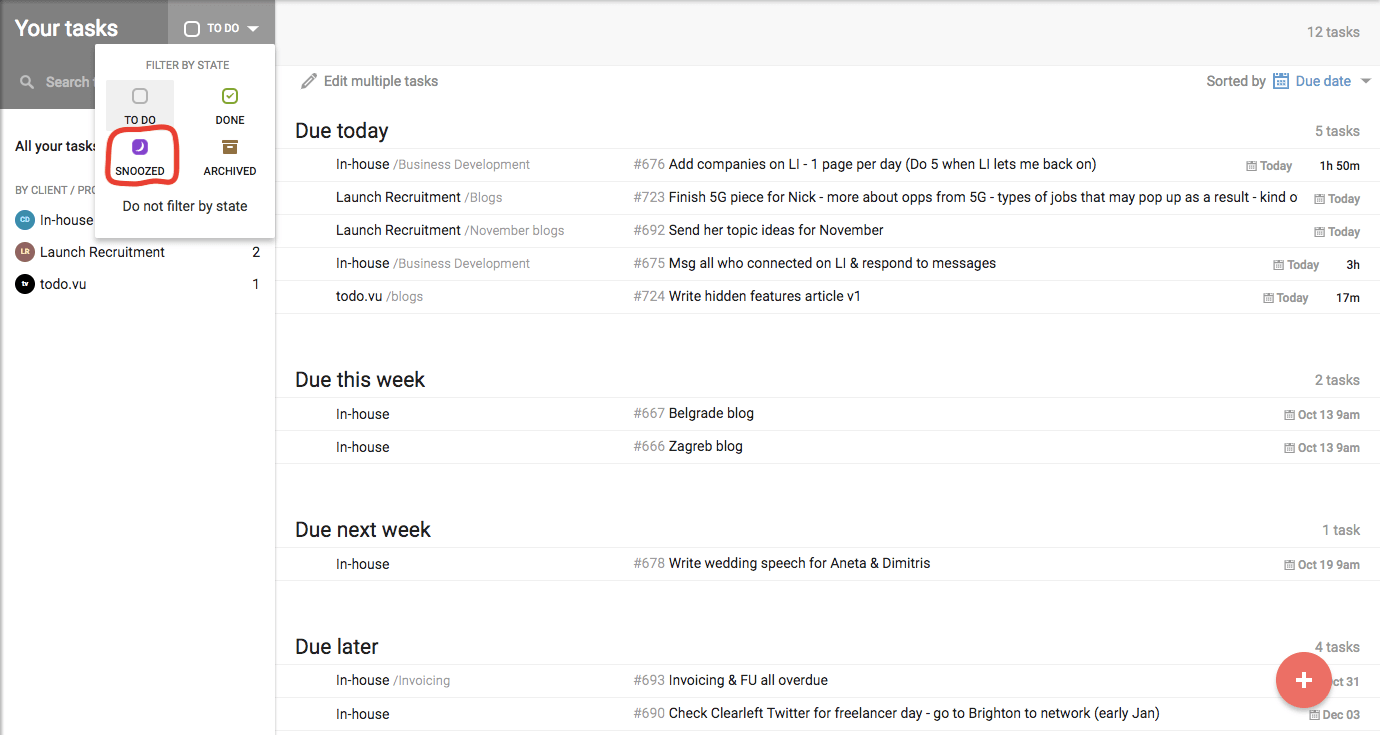
The previous action will bring up a page listing all of your snoozed tasks so that you may review or edit them at any time.
So that you remain aware of snoozed until tasks, the tasks which you have selected as those to be completed before the others un-snoozing, will have a highlighted selection notifying you that another task is being snoozed until this one is complete.
For more, you can visit our support