Time and Billing Settings
If you’re in the business of charging clients for your time, you’ll know there’s never one way to charge, and almost every client, team member or contractor will have different charge-out rates and terms.
todo.vu understands the complexities of consulting and has designed a multi-tiered hierarchy of time and billing settings. We allow you to easily customise and automate different billing rates to meet the ever-changing needs of your business.
This page will show you how to set up billing rates for your Workspace, Client Projects (Projects for a Client), Project Users (Users on a Project) and individual Users. You’ll learn how to find and edit different billing settings and which settings override which.
Jump to:
- Workspace (default) time & billing settings
- Client billing settings
- Team member billing settings
- Project billing settings
- Project User billing settings
- Hierarchy of settings
Please note – If you work in a team or with collaborators, you will need to sign up for todo.vu’s Business Time plan to make use of all of these billing features, as the Solo Free plan permits one staff user only.
Regardless of your todo.vu subscription, only ‘Admin’ users can set and adjust billing rates.
Workspace time and billing settings
Your Workspace time and billing settings, once set up, will be your default across your Workspace when you’re tracking time.
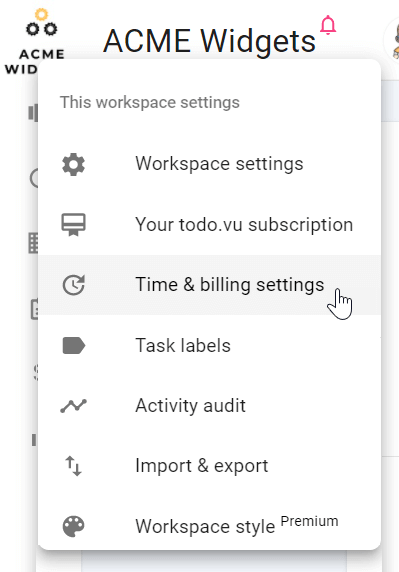
To configure these settings, click on your Workspace name at the top of your screen, and select ‘Time & billing settings’ from the drop-down menu that appears.
Or, once you’re already logged into todo.vu, simply follow this link to access your time and billing settings.
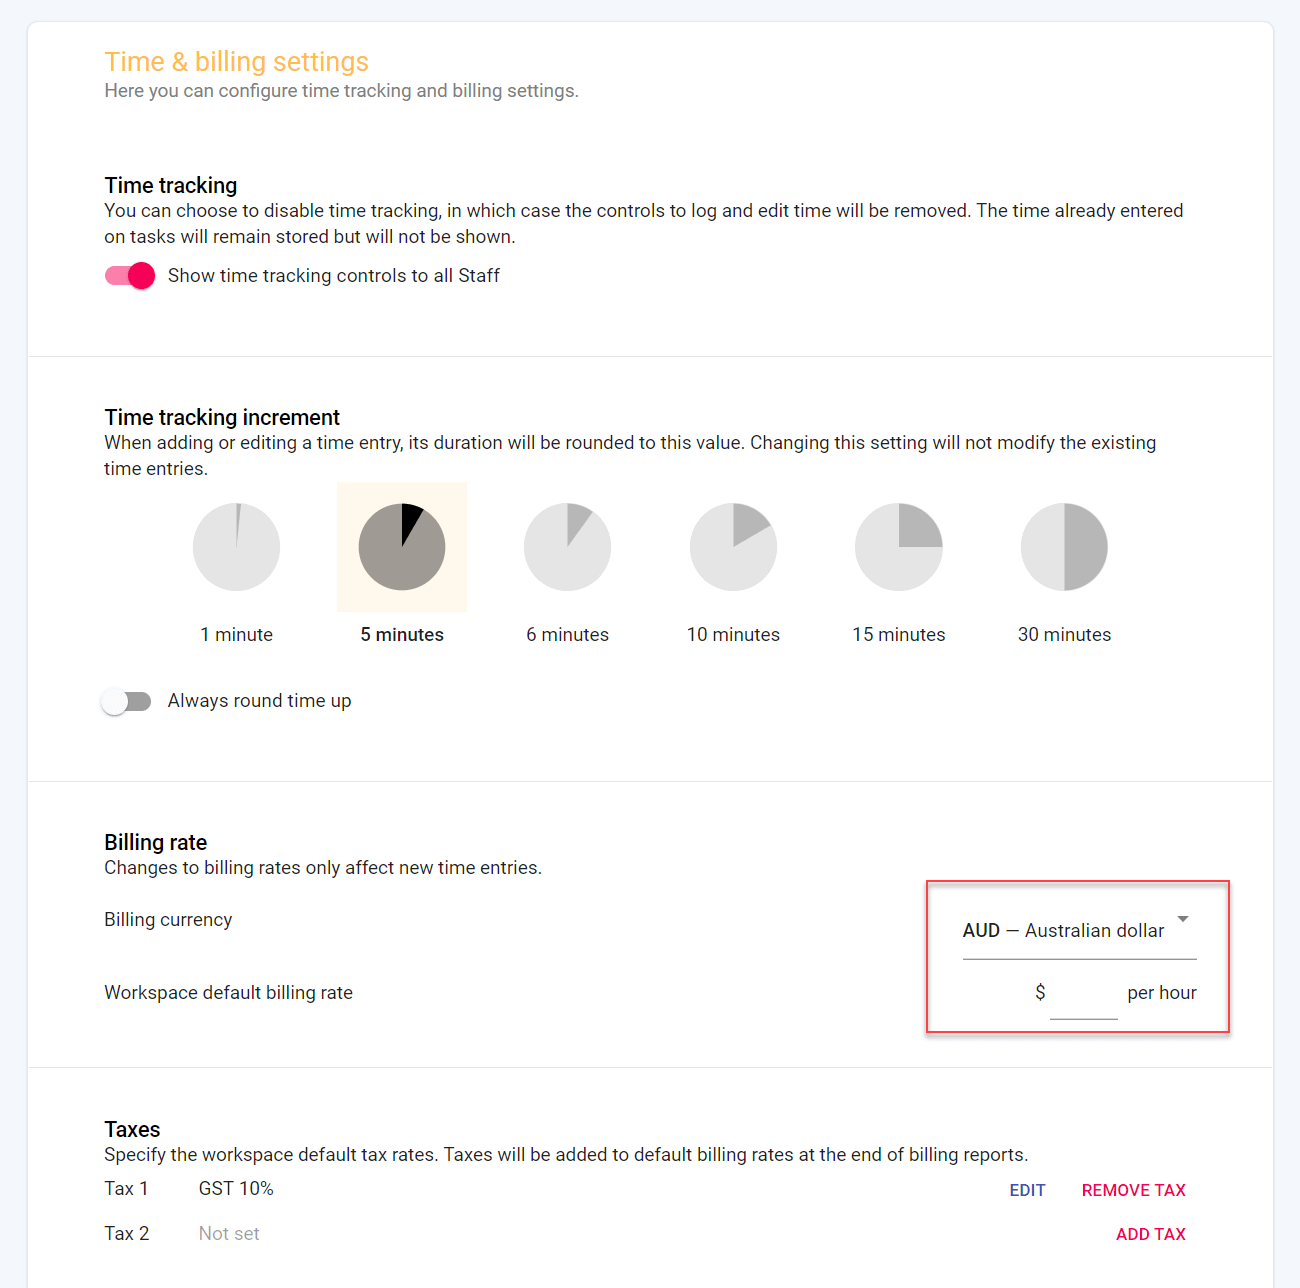
On this page, you will be able to set up the following:
Time tracking
You can choose to disable time tracking in todo.vu, which means you won’t see the timer and you won’t be able to track and record your time on tasks. Any time already logged to tasks will remain stored, but will not be shown.
That way, if you want to use todo.vu to organise and manage your tasks only, rather than to track your time, you will have a clean and clear platform to do just that.
Time tracking increment
Because no two businesses are the same, the time tracking increment setting is designed to give you the flexibility to adhere to your unique billing and business reporting requirements.
You can choose to round your recorded time to the nearest 1 minute, 5 minutes, 6 minutes, 10 minutes, 15 minutes or 30 minutes when editing logged time or stopping your timer on a task. You can also choose to round up your recorded time to the nearest minute; simply select ‘Always round time up’ from beneath the increment icons.
Billing rate
Here, you can select your applicable currency and enter your default billing rate. This will be the default billing rate across your entire Workspace. This means that your time will be recorded at this rate on every task, unless you make edits to the billing settings of particular projects or team members. More on this below.
Note – Only one currency can be selected per Workspace.
Taxes
Here, you can input default tax rates for your Workspace. If you are in Australia, for example, you would input 10% for goods and services tax (GST).
Your tax totals will be automatically calculated for you when you create your time billing reports.
Billing report style
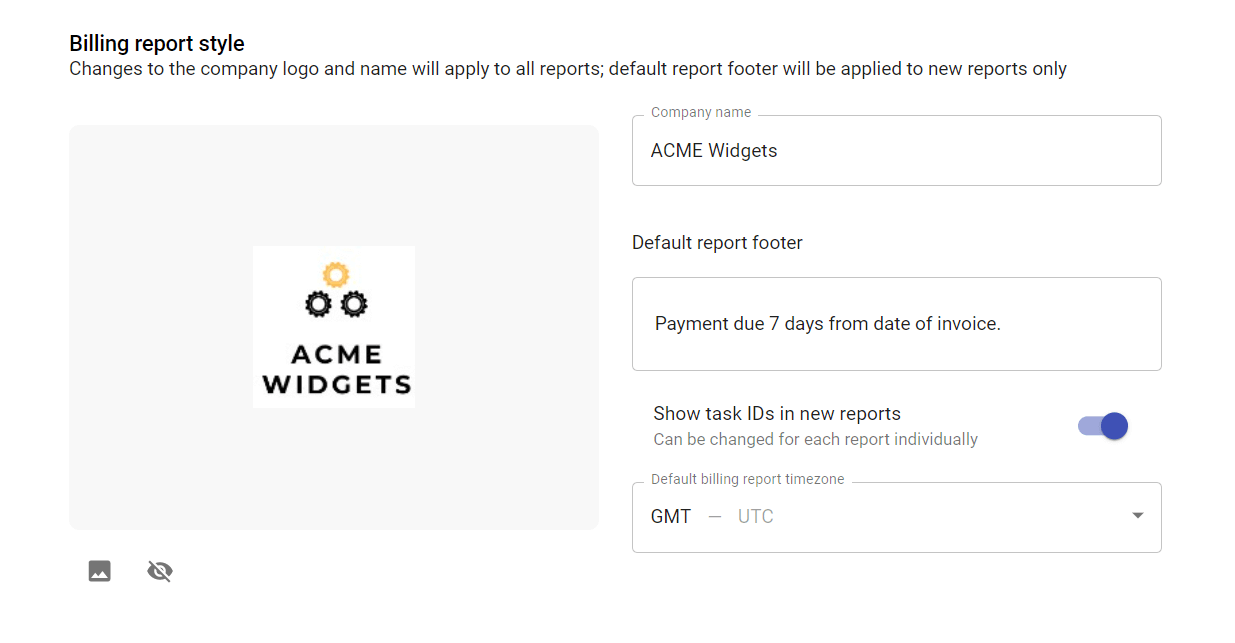
If you have subscribed to todo.vu’s Business Time plan, you can customise your billing reports you send to your customers in this section.
You can add your company name, company logo, a default footer (for example, you could choose to detail your payment terms across all of your reports), and your time zone.
Client billing settings
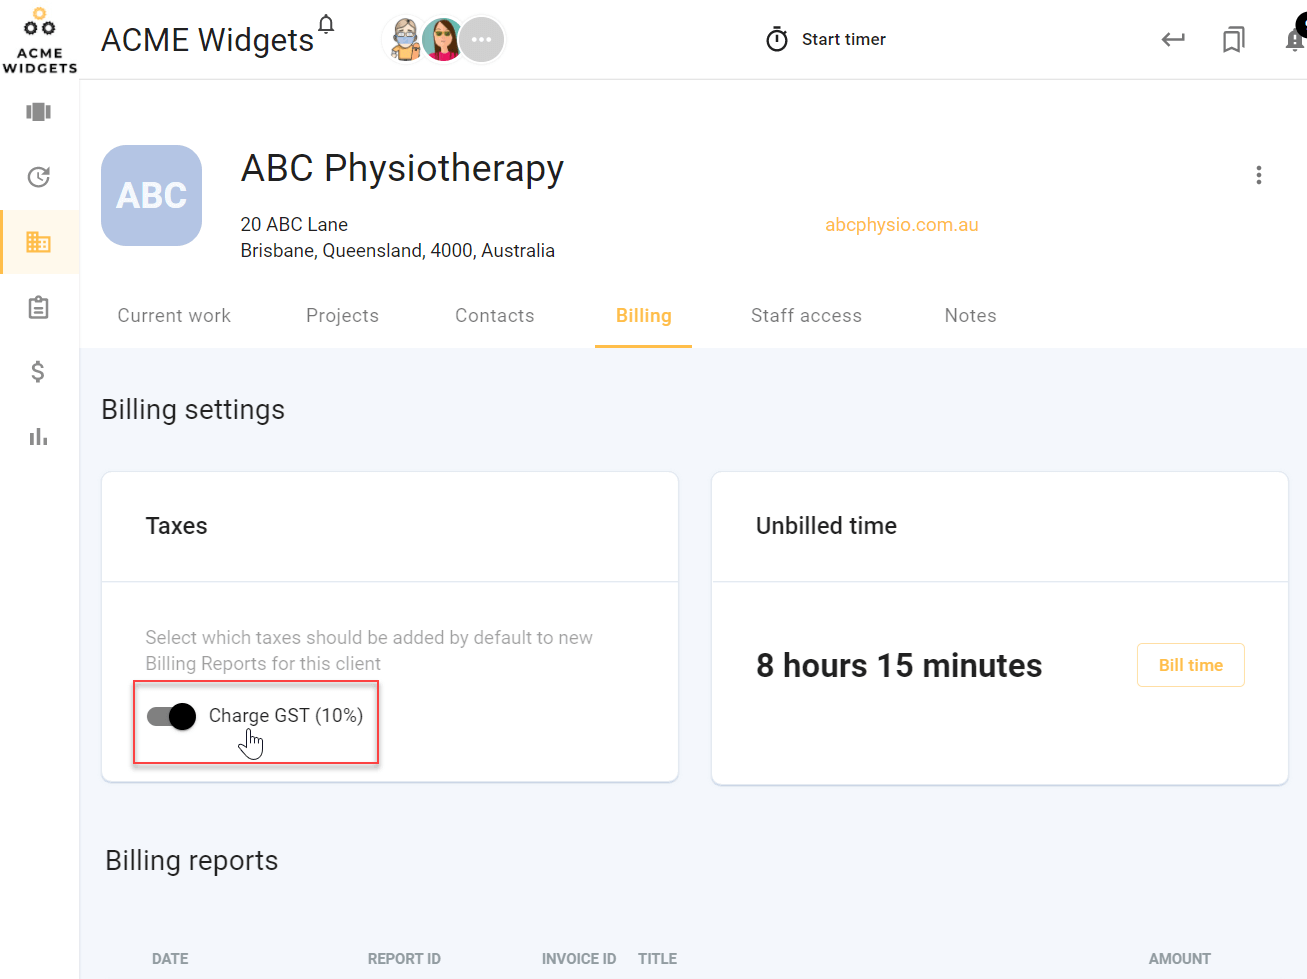
In todo.vu, the only change you can make to client billing is to the tax rate.
You can still bill Clients at different rates if you need to, however, you’ll have to set this up at the project level. (You can customise your charge-out rates on specific projects, but more on this just below.)
Click on “Clients” in the left sidebar (or follow this link when signed in to your Workspace). Select a Client and select “Billing” to change the tax rate for that Client.
Team member billing settings
Click on “’View all team members” next to your team avatars at the top of your Workspace (or follow this link when signed in to your Workspace).
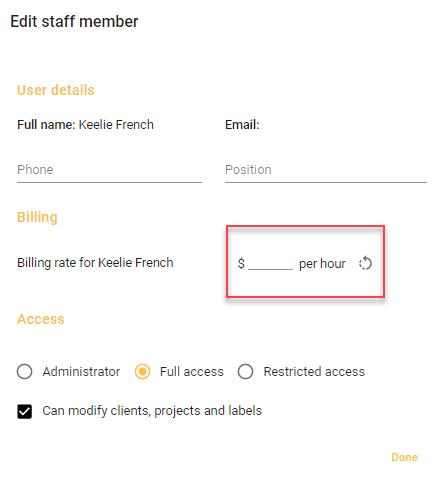
Select which team member you want to adjust the billing rate for. Then, select “Edit user details” by clicking the three dots in the upper right-hand corner of your team member’s profile. Here, you can manually change the default rate for that staff member.
Project billing settings
You’ll likely need to bill different clients at different rates. Your Project billing settings is where you can do this.
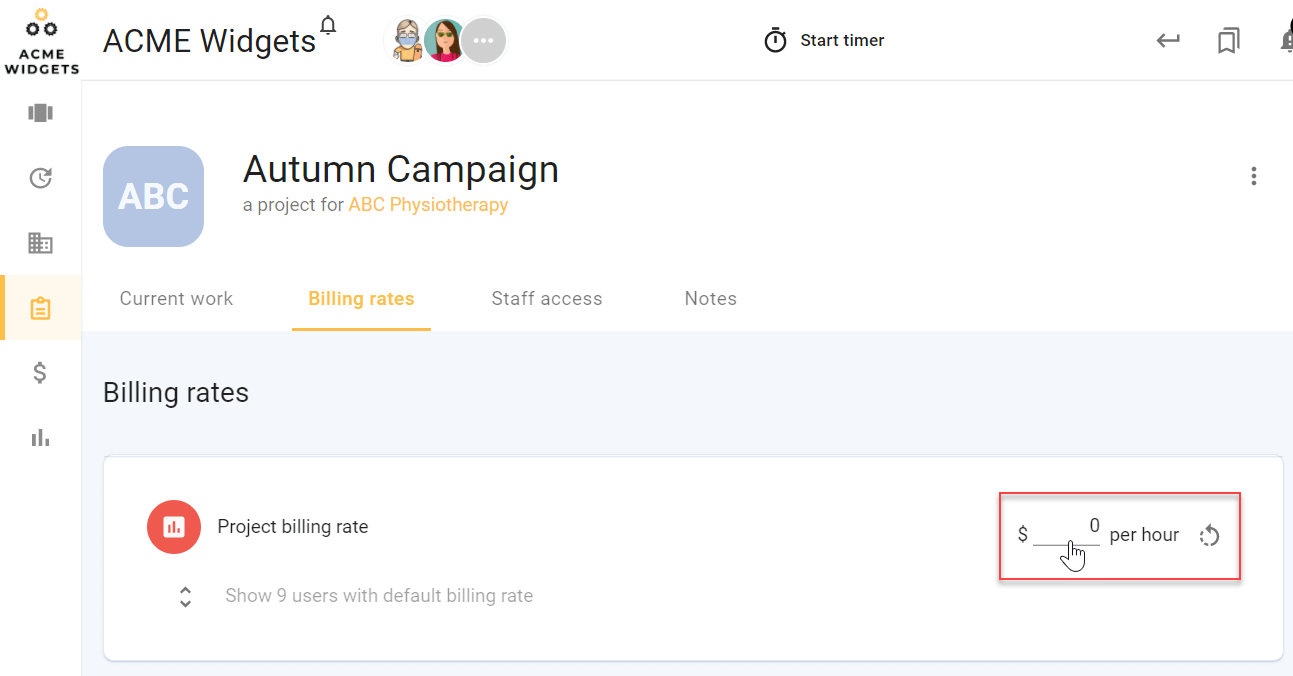
Click on “Projects” in the left sidebar (or follow this link when signed in to your workspace). Select the Project you would like to edit and select the “Billing rates” tab.
Edit that project’s default billing rate here. This means that any time tracked to this particular project will now* be charged at this rate, regardless of your Workspace billing settings you configured above.
*Note that changes to billing rates only affect new time entries.
Project User billing settings
Navigate once again to the Project’s billing settings that you want to edit.
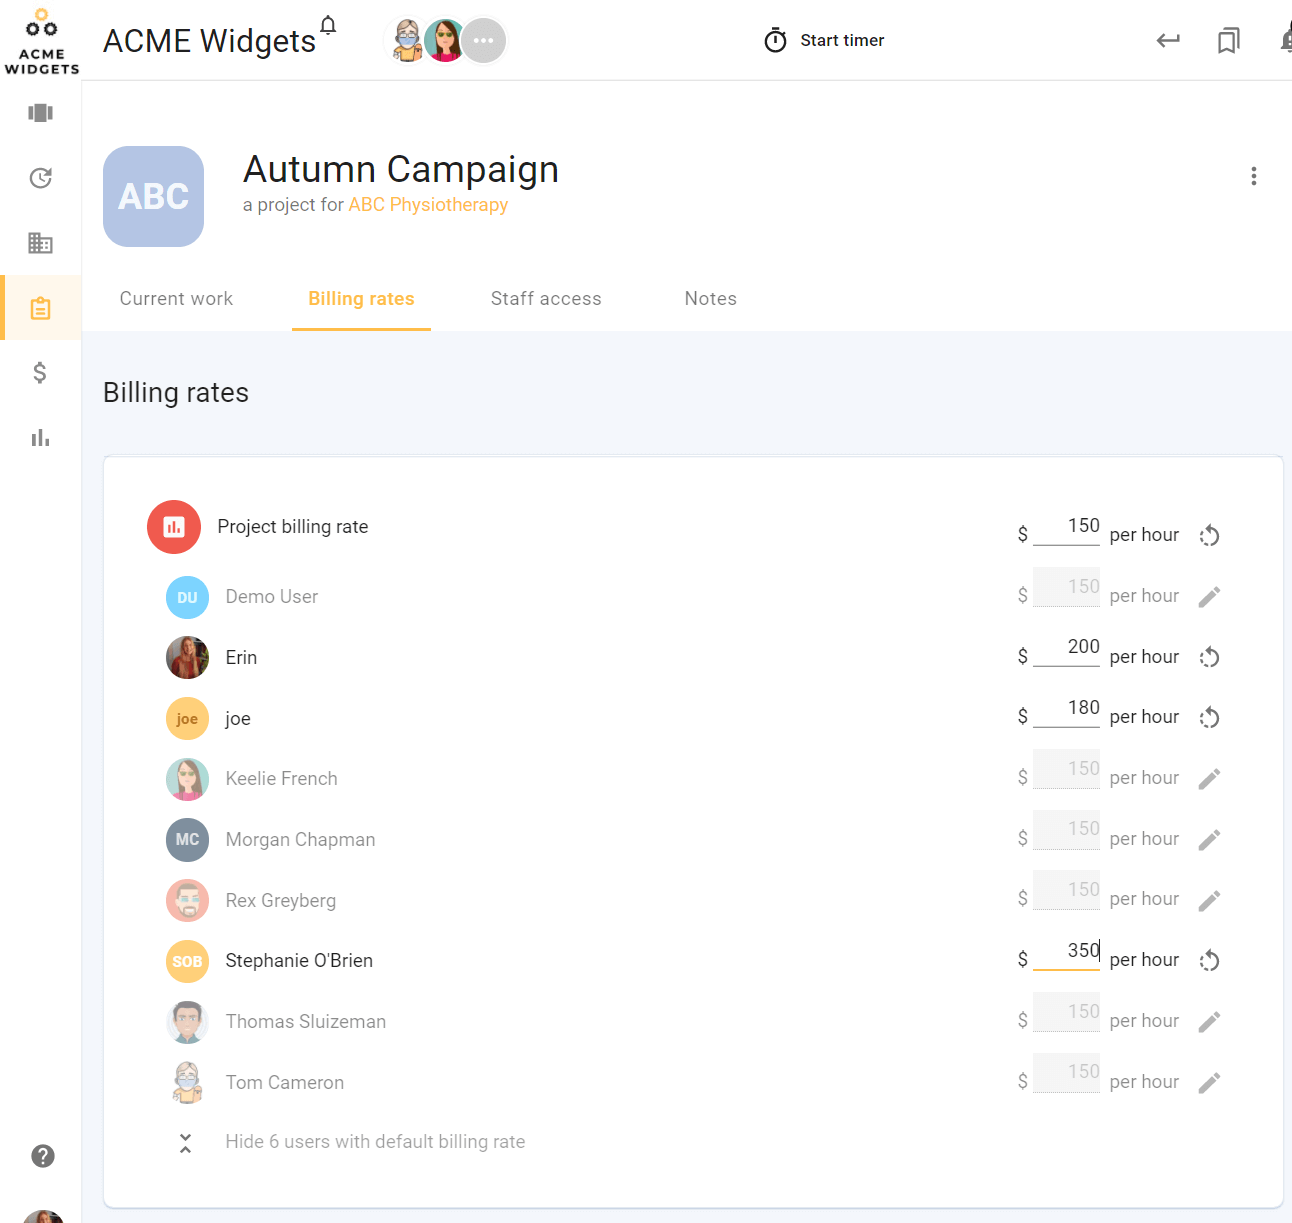
You will see a button under “Project billing rate” that says, “Show x users with default billing rate”. Click this to view all team members connected to this Project and edit their billing rates as they apply to this particular Project here.
This means that you can set a unique billing rate for Users that track time to this specific project, regardless of their billing rate that was set at a User level.
Hierarchy of settings
- Billing rate on Workspace: default across all Projects, Clients and Team members.
- Billing rate on each team member (staff User): overrides Workspace settings.
- Billing rate on Project: overrides Workspace and team member (staff User) settings.
- Billing rate on User on a Project: overrides everything.

