7 easy steps to get started with todo.vu & on your way to beautiful billing
New to todo.vu? Welcome!
We’ve put together this quick guide to help you make the most of todo.vu from day one.
todo.vu works best for freelancers, consultants and teams who need to organise, track, and bill for their time. If that sounds like you, you’re in the right place.
If you need more help, make sure to get in touch with us.
1. Customise your todo.vu workspace
Why is this important?
Personalising your todo.vu workspace to your brand is an easy way to love working in todo.vu every day. It also means you can add branding to any billing reports you provide clients. (But more on those later.)
How to do it:
You’ll see the title you first assigned to your todo.vu workspace in the top left-hand corner. Click it, and navigate to ‘Workspace style’ in the drop-down menu.
and update your workspace’s title.
You can also choose to hide your workspace’s title; just your logo will display at the top left-hand side of your workspace with this setting.
You can also update your workspace colours, and add a custom email footer that appears with any automated email notifications pushed from your workspace.
2. Set up your billing rate and currency
Why is this important?
Not only can you track your time in todo.vu, you can also quickly create detailed billing reports with automatic calcuations from this tracked time.
To do this, you have to have set up hourly billing rates in todo.vu
How to do it:
Head back and select your workspace title or logo. This time, select ‘Time & billing settings’ from the drop-down menu.
On this page, you can change your default billing rate and currency, and set your taxes. (Don’t worry if you have different billing rates for different clients, we can customise these rates too).
Learn more about your time & billing settings here.
3. Add your unique todo.vu email to your contacts’ list
Why is this important?
Your todo.vu workspace has its own email address. With it, you can create todo.vu tasks directly from your email inbox. Whenever you send or forward emails to this todo.vu email address, a task is automatically created in todo.vu.
So, it helps to save this email address to your contacts.
How to do it:
Go to your todo.vu account settings like so:
Select your profile picture icon at the bottom left-hand side of your workspace, select ‘Your profile and account actions’ from the available options, and select ‘Workspaces’ on the left. Or, simply go to this link when you’re logged in.
Next to ‘Add tasks via email’, you will see your unique todo.vu email address.
Save this address to your email contacts. Now, whenever you want to create a task from an email, just send or forward (or CC/BCC) the email to your unique todo.vu address.
4. Invite others to todo.vu
Why is this important?
If you work with a team (and even if you don’t), you can invite others to todo.vu, too. That way, you can easily collaborate with more people, see who’s doing what across your team, and never miss another deadline.
How to do it:
You can invite anyone to todo.vu via your Team page. Go to your Team page by selecting the avatar icon at top left-hand corner of your workspace.
Then, on the Team page, select ‘Add staff’ at the top right. A pop-up will appear. Enter your collaborator’s details; select ‘More details and access’ before ‘Invite to log in’ to manage what they can see and do in your workspace.
You can update these details at any time, so if you forget to do it initially, it’s no problem. Learn how here.
5. Download the mobile app
Why is this important?
So you can take your todo.vu workspace wherever you go! If you need to assign a task to a team member on the go, or retrieve any detail at any time, you can do so straight from your mobile phone.
Where to get it:
You can download the todo.vu app for Android devices here, and for IOS devices here.
6. Create a task
Why is this important?
Tasks are where the todo.vu productivity magic begins. Tasks help you easily manage your clients, projects, workload, time, and billing.
What’s the easiest way?
You can add a task to any of the three columns, or workflow statuses, that you see on your Task dashboard: ‘Snoozed’, ‘To Do’, or ‘Done’.
Hit [Ctrl]+[Enter], or place your cursor in the Task Adder at the bottom of your screen. Type in your task.
To quickly add the task, simply press [Enter]. To add more details to the task, press [Ctrl]+[Enter] after you finish typing in your task. This will open up that task in Draft mode.
Further details you can add to a task include:
- an assignee
- followers
- title
- description
- checklists
- files
- and more!
You can also add a client and project to the task to organise it according to these details and, importantly, to ensure your data can be used to create billing reports for clients (learn more here).
To publish a task from Draft mode, select ‘Create task’ at the bottom right-hand corner of the task.
7. Track your time
Why is this important?
By tracking the time you spend on tasks, you can easily see how long tasks take, and who’s doing what (and when) in your team. In todo.vu, your logged time can quickly translate into time billing reports for quick and accurate invoicing, which means a better cash flow for you.
How to do it:
When you’re ready to get to work, simply hit the ‘Start timer’ button up the top of your workspace.
If you already had a task open when you started the timer, todo.vu will track time to that task. If you didn’t, you can choose which task you want to log time to at any time. To stop the timer, simply click on the timer again.
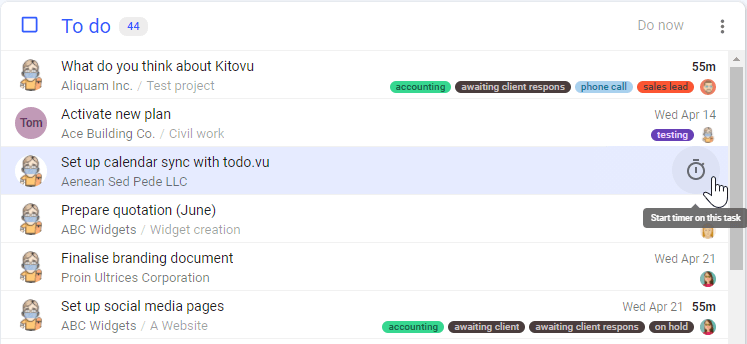
You can also start and stop the timer directly on a task within the Task dashboard.
To manually record time you’ve already spent on a task, open the task, click the ‘Time spent’ option at the top right of the task, and select the plus icon (+) on the left to log time.
Now, when you’re ready to invoice your client, you can quickly create a detailed billing report.
Head to your workspace to get started with todo.vu now, or learn more about time billing here.
READ NEXT:
Learn how todo.vu works. Read here >>


